This is the second post in my "Making the Image" series where I take one of my shots and talk through how I went about making it.
This post features a recent image from an autumnal Padley Gorge. Yes, it is of another waterfall - I shall try to avoid using a waterfall for the next image in the series (they have a magnetic attraction for me I'm afraid!).
My ambition with this series of posts is to show you some of the thinking that goes into a shot and dispel the myth that good photographs "just happen", they take work and conscious effort in making often small adjustments to give an image that you're happy with. If you missed my first "Making the Image" post you can find it and further rationale behind the series here "Making the Image: Waterfall, Rydal".
Padley Gorge
[osmap width=400 height=400 markers="SK 25628 79757;Padley Gorge"]
I had previously been aware of Padley Gorge having seen it appear about this time of year in Flickr photostreams. However I hadn't actually visited it before this year and I'm so glad I found it.
Although Padley waterfalls during autumn risk being overshot, it's popularity is deserved. It's a beautiful area, with scores of little waterfalls and beautiful trees along Burbage Brook, with even more interesting and often gnarled trees high up on the banks. You could lose yourself in Padley for a very long time and still find something new to shoot.
I've made 4 or 5 trips over there now and I took a half day off work last week to spend there. I was worried that the recent wind, rain and cold nights would have stripped the trees of their autumn cloak but despite a lot of leaf fall it's still very colourful. I have a couple of favourite spots further down the gorge that have featured in recent shots on my site. This time I decided to approach it from the top which seems most popular judging by the number of cars normally parked there.
As ever I planned to be there early. Unfortunately I'm still a sucker for a sunrise so I started my day at 6.30am at nearby Higger Tor, though I was quick to get in the car and head into the gorge for 7.30am. There was much less cloud cover than forecast and I had hoped for and so I was worried that bright sunlight would ruin the prospects for the morning. However the gorge is quite deep and it wasn't until well after 10am before the sun started to encroach on my shots.
I'm not going to bore you with all the details of the trip but I'll share with you a particular sequence early-ish on, about 8.30am. As I said I started from the top and worked my way down the gorge. Rather than stick to the path, I dropped down to the brook and picked my way along it on the lookout for interesting features. At some points trees and rocks get in the way so you have to be careful clambering over them, swinging around them or having to come back up the gorge side to avoid them. Generally it feels like a bit of an adventure working your way along like this which I like!
Autumn Fall
 I came across a series of waterfalls under some large beech trees which had shed most of their leaves onto the ground and rocks on the edge of the stream. Here's a pull back shot that I took to show the scene. I actually kinda like this even though it's just a record shot. Perhaps I should've spent some time making the most of it!
As you can see the waterfall I was drawn to was actually to the side of the main falls and was flowing a lot more slowly. Although we're drawn to the raw force of more powerful falls, I find it can actually be more pleasing to shoot slower flowing falls - the flow doesn't burn out to white so quickly, and you tend to get better, whispier definition in the water. Here is the contact sheet of the images I shot at this location:
Unlike with the previous post in this series there are fewer changes in composition. As I mentioned in that post quite often when you're working with waterfalls you can be limited in terms of space to move to get big changes in composition - often you have to take what you're given or walk by. However there's a few interesting points in this series that I thought worth sharing.
Given the fall was on the far side of the brook I started with my 135mm, shots 1-8. I feel my focal length is a bit long, I wanted to be tight but I'm a bit too tight. I'm either not getting enough water at the bottom which makes the image feel unbalanced, or I'm not including the leaves above the fall which were one of the main draws to me. As well, you may be able to tell from the pull back, the rock in the bottom right with the leaves on is quite angular and I thought it was an interesting lead-in. Indeed, it was the shapes and angles of the surrounding rocks and the leaves that made this waterfall attractive to me.
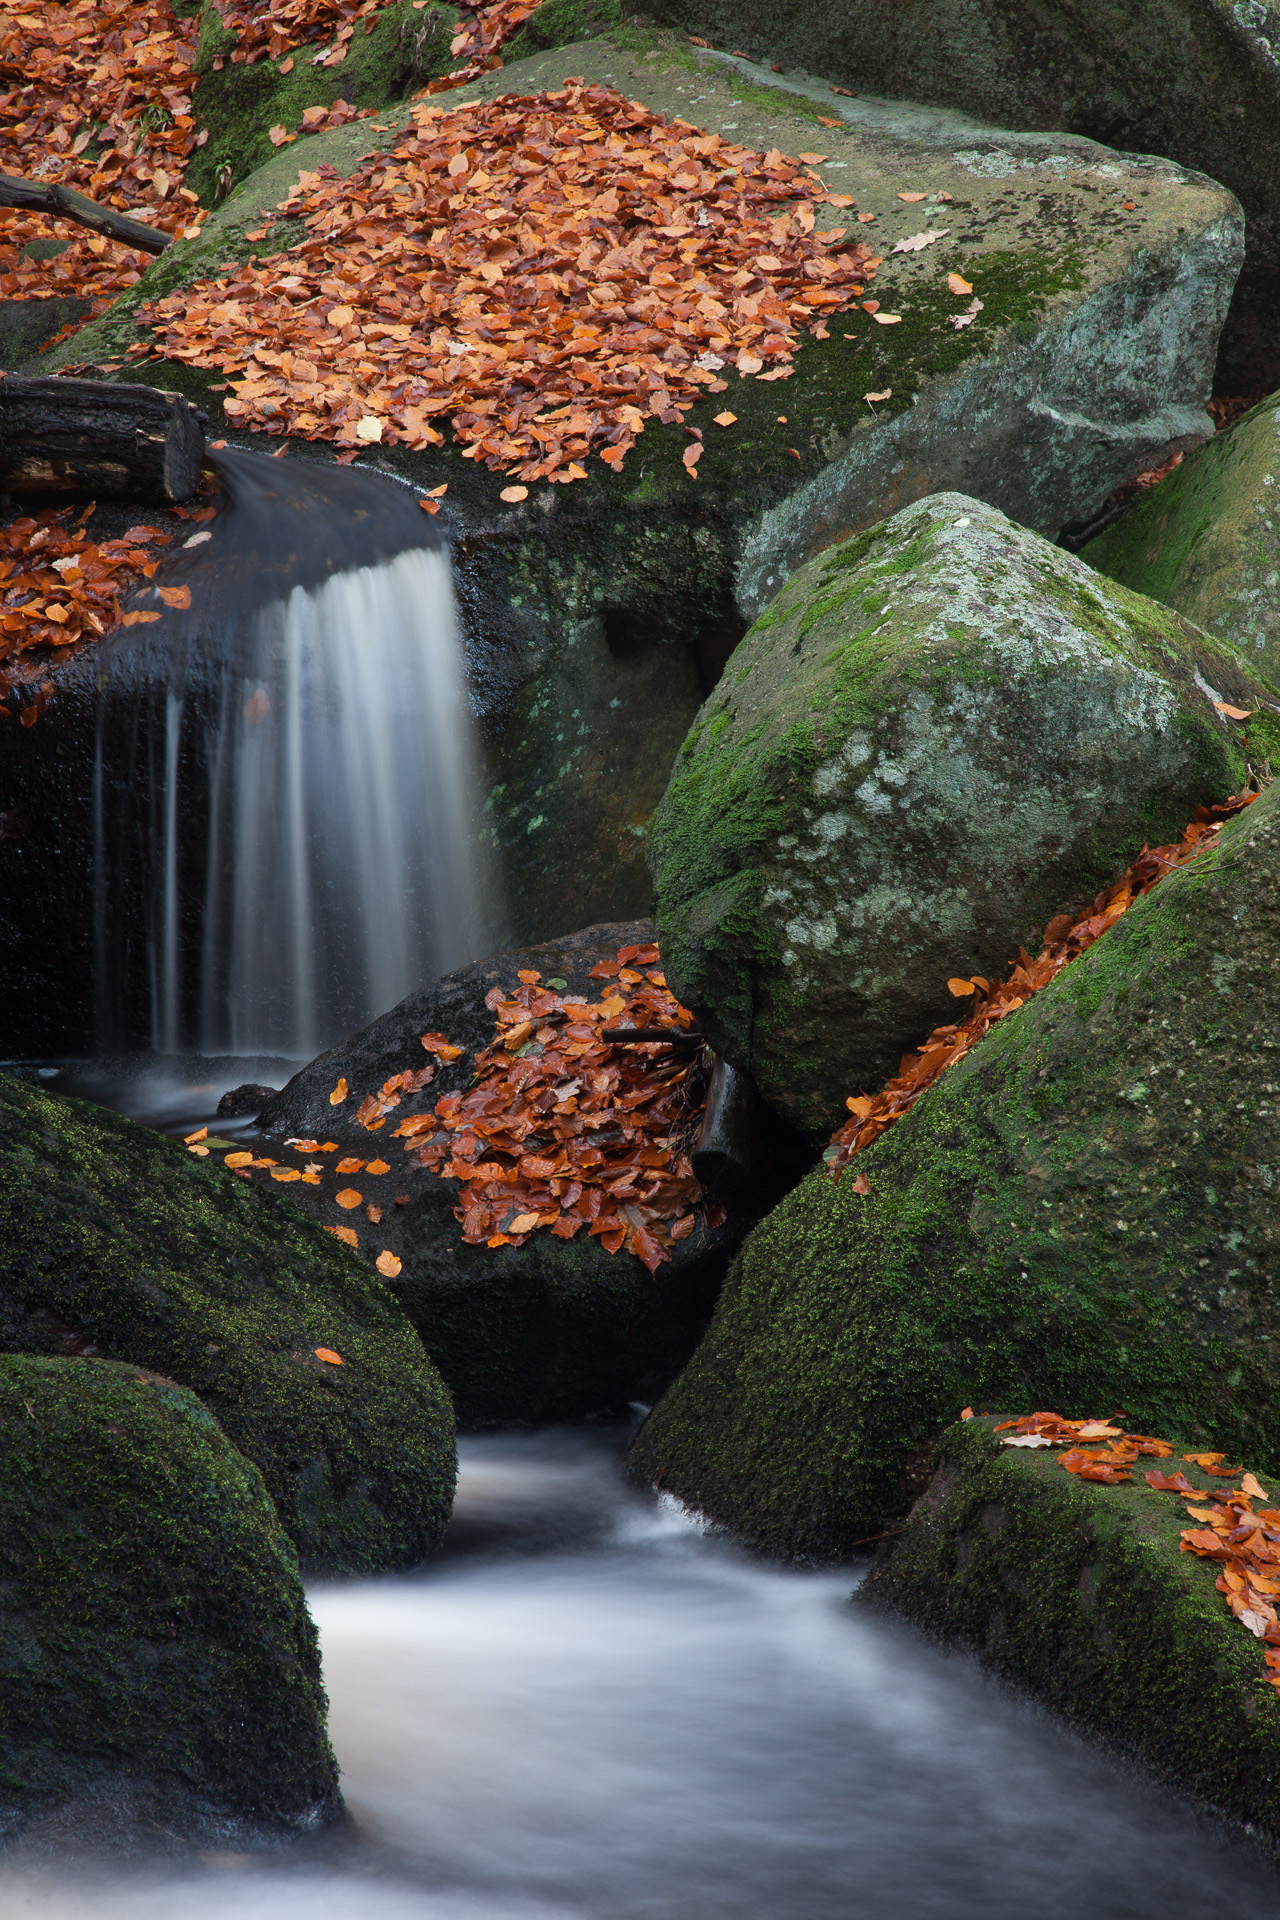
So I'm not happy that I've chopped it off, and in general the foreground just feels like "it's there" rather than adding to the image. Although I prefer to avoid zooms - something I'll discuss further in another post - I always carry my 24-105mm with me for "needs must" situations. I start out at 105mm, still convinced I wanted this to be a tight shot (9):
I've now got more water at the bottom and my leaves in at the top, and it's starting to feel better. I'm still missing the rock in the lower right, and the foreground still feels like a distraction rather than a part of the image.
In addition the dark rocks down the left seem to be at odds with the bright rocks towards top right. Whilst contrast is something I often look for in image, when it's not the main theme of the image it can be a distraction instead. Here the different shades of rock are competing for my attention and I feel the waterfall and leaves become secondary.
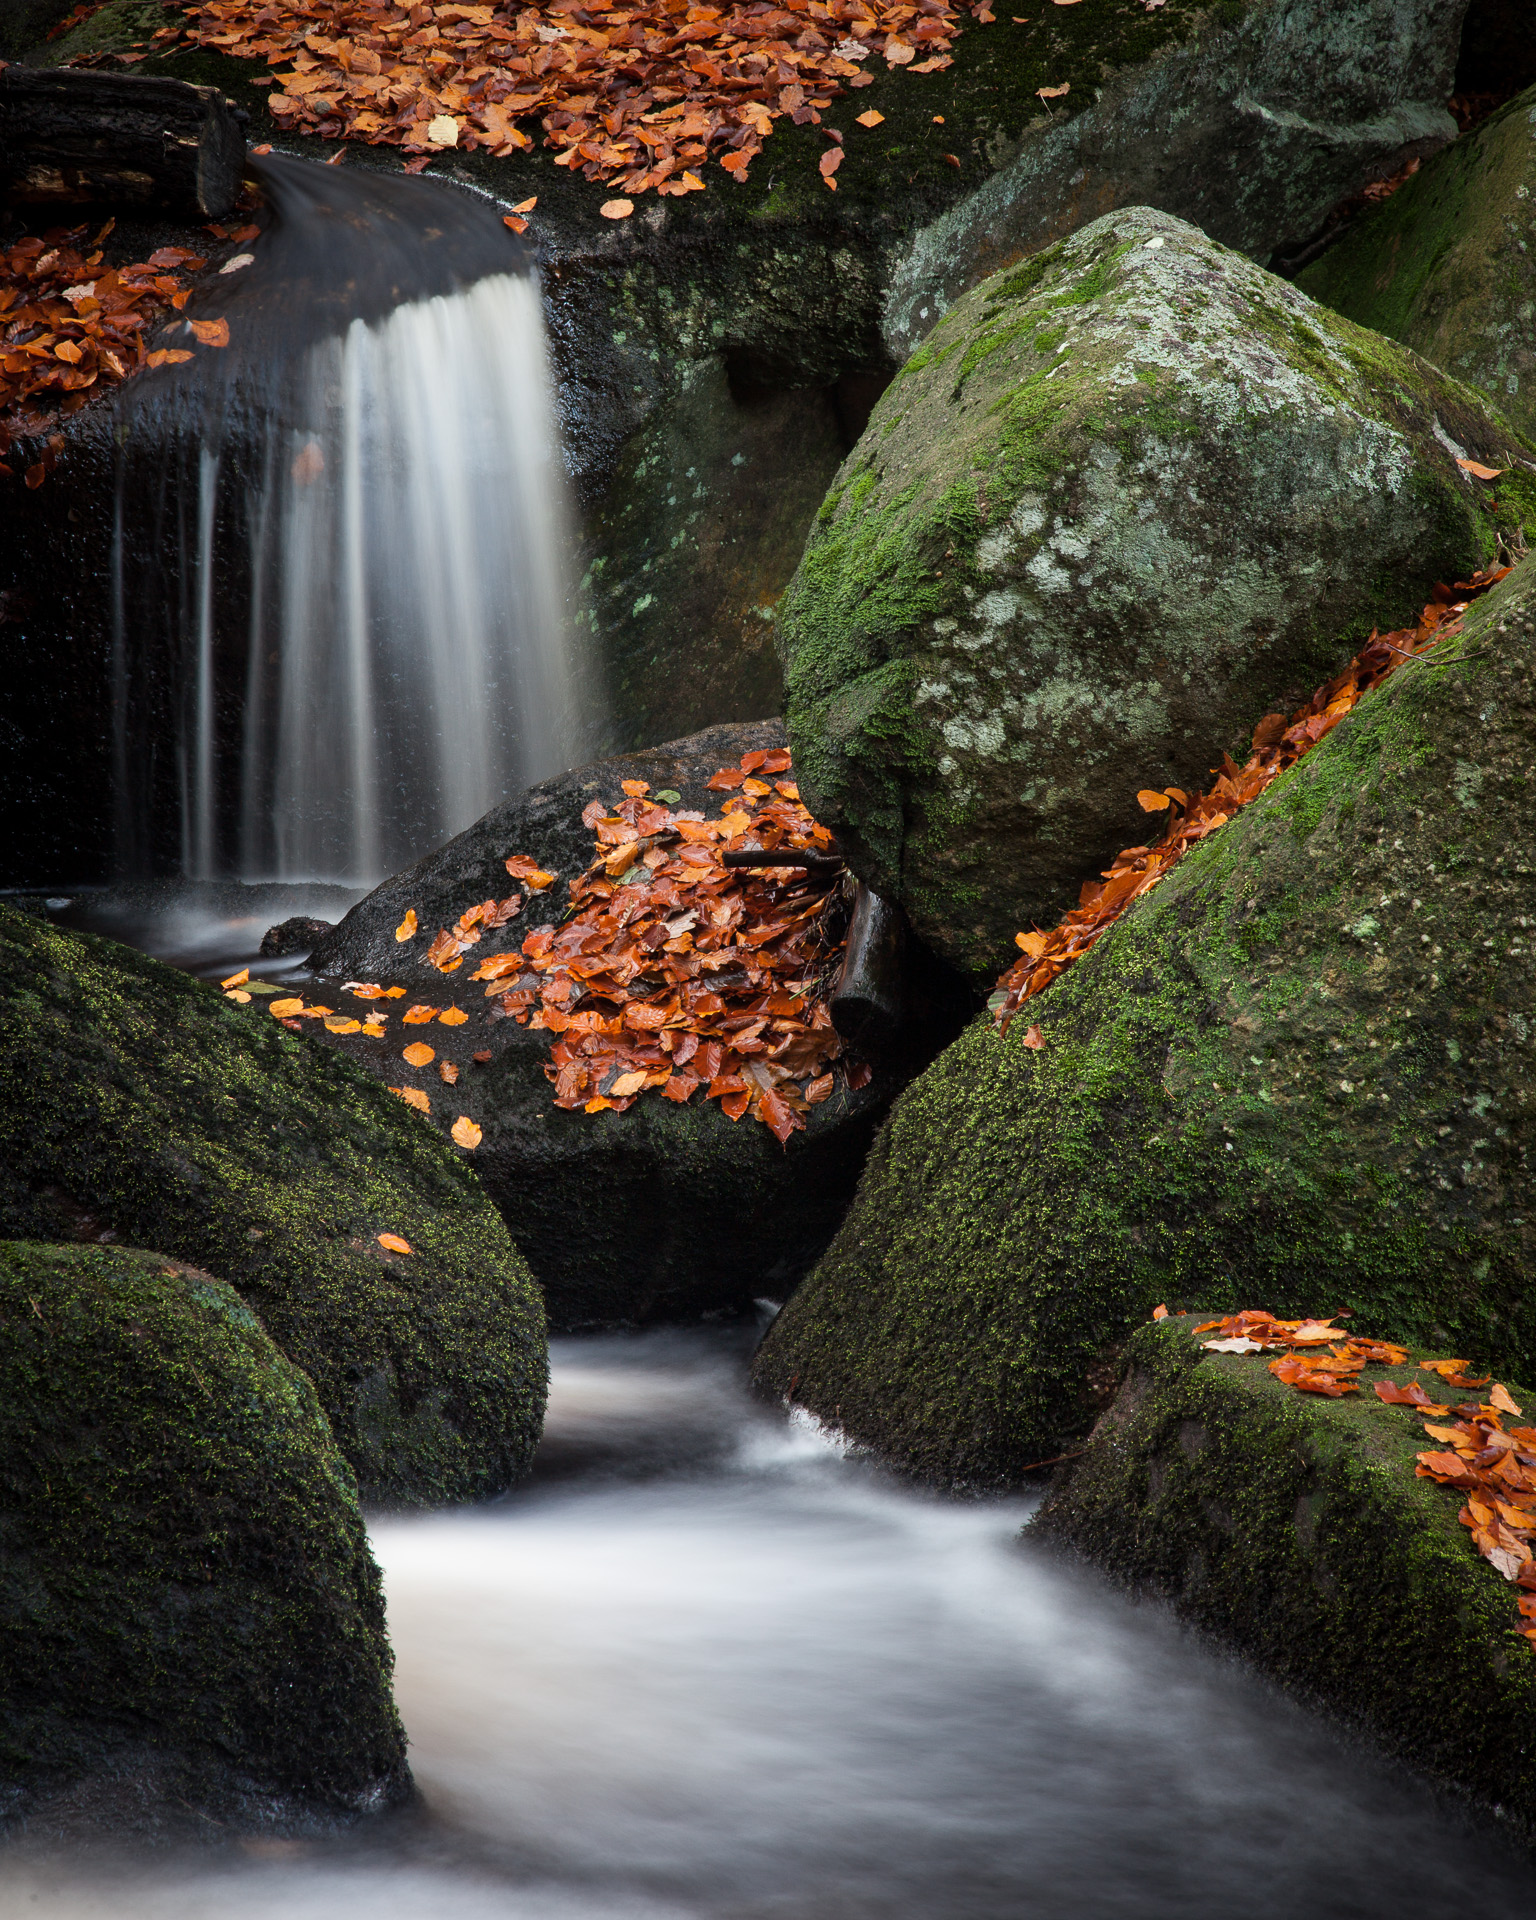
From here I want to move my viewpoint further to the right to remove the rocks bottom left, bring in the rock bottom right but keep the waterfall in shot. I give a cheeky twist on my zoom to 75mm to get the bottom right rock fully in frame and bring in more water across the bottom of the frame. This pretty much gets me to my final composition (17) which I'm quite happy with.
Focusing
Getting focus spot on for this shot was going to be tricky as I'm using a longer focal length (more below). Let me tell you what I did and then what I should have done.
My intuition told me that f/16 focused on the bottom right rock would get everything in focus. Of course, my intuition was wrong and I'll cover the details further below. But if nothing else, I should have focused beyond the front rock - there was nothing of interest before the rock, and I knew I would be struggling for DOF at the back. I should have realised that the next rock was probably more appropriate. It maybe should have told me to check the facts before the shot rather than after as I did.
As my previous post Getting Focus shows, with a longer focal length (which I'm using here) I get less depth of field. One of the challenges I find with zooms is how inexact the focal length reading is, due to relatively few markings on the lens barrel. This then makes getting an accurate hyperfocal distance calculation difficult. I think I took a guess at 85mm (better to err on the side of less DoF than more) and so I can see from DOFMaster that the hyperfocal distance at f/16 would be 15.1m, which gives me a near limit of focus of 7.55m.
However I've guessed - and I'm rubbish at guessing distances - that the near rock is about 4m, so the hyperfocal distance is no use to me here. Indeed I don't need to worry about a far limit of infinity as the scene is contained within a range of 5m or so.
(As a sidenote I often use the focus distance markings on the lens as a crude distance measure. Again this has problems with too few markings and questionable precision, but it gets me a ballpark).
Looking at DOFMaster now I can see that at f/16 focusing at 4m (where I think the rock is) gives me a near limit of 3.17m and a far limit of 5.41m, for total DOF of 2.23m. This isn't quite enough for this scene. A focus point of 5m would give me 3.77m - 7.42m, for a total of 3.66m and I think this would have been enough.
Unfortunately I checked DOFMaster after I'd taken the shot and convinced myself that it would be just about enough. I would have been better adjusting the focus point.
However I did have the awareness to try the same shot at different apertures to demonstrate some points I made in my Getting Focus post, and even tried f/22 to give me extra leeway. I'll show you why that didn't quite work out below.
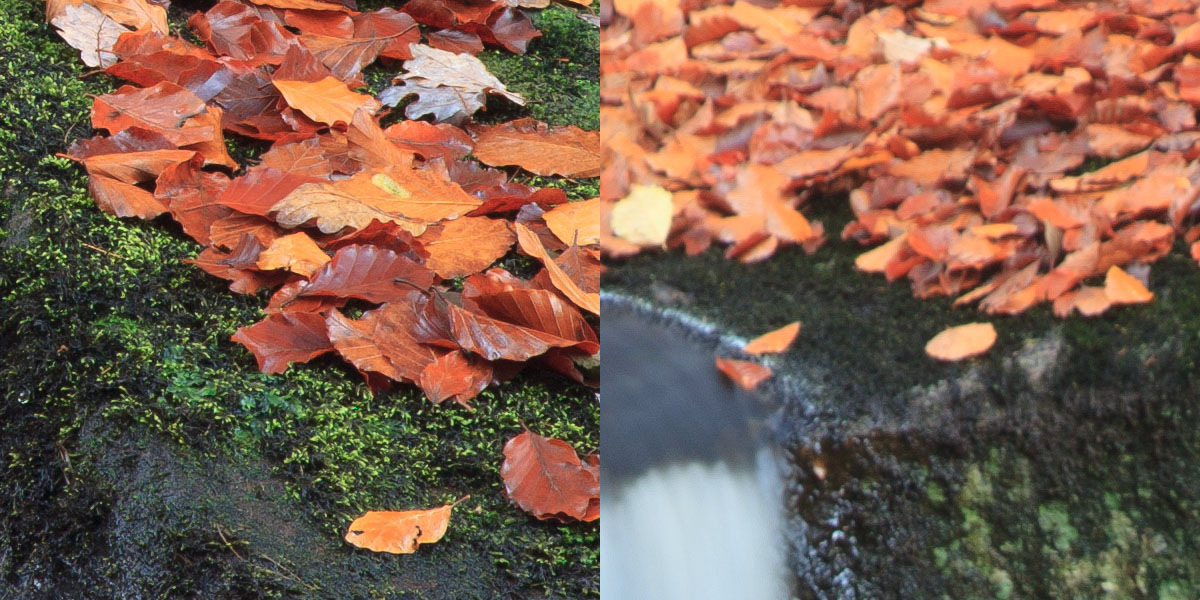
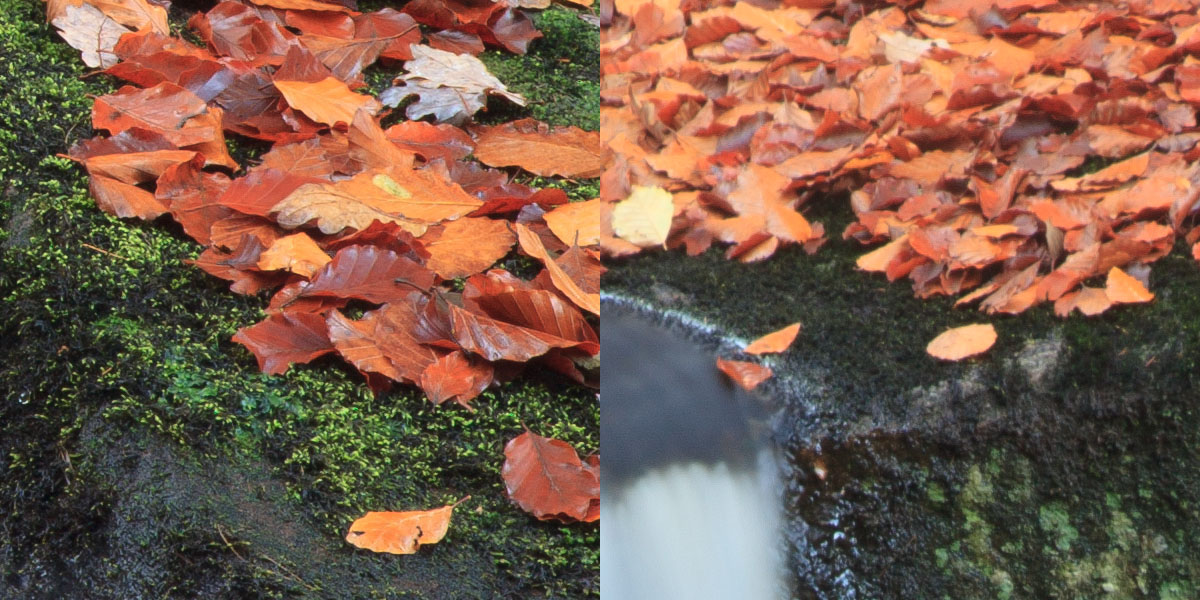
The below are 100% crops of the same image shot between f/9 (was meant to be f/8 - oops!) and f/22. On the left is the foreground rock bottom right. On the right is the background above and right of the waterfall.
As you can see maximum sharpness at the focus point is between f/9 and f/11. However the background is notably out of focus at both f/9 and f/11.
f/16 has notably better sharpness in the background but is still a little soft. f/22 has a bit more detail in the background.
The interesting thing is comparing the foregrounds for f/16 and f/22. For me f/22 is noticeably softer than f/16. This demonstrates the point I was making about lens performance and diffraction in Getting Focus. f/22 gives us more consistent sharpness front to back but is overall less sharp. f/16 seems like the best compromise here. Though softer in the background sharpness here is less important than in the foreground where we expect better sharpness.
Of course the best overall solution would have been to move the focus point back to 5m. This would have kept the foreground sharp but also brought the background into better focus. One to remember for next time.
Length of Exposure
A point I made on a recent workshop I ran was regarding the effect of long exposures on water. I talk about this in passing in my Guide to Long Exposure Photography. As I changed my aperture in the previous experiment the shutter speed was changing to compensate.
This gives a good demonstration of the effect of shutter speed on the water. As you can see the waterfall itself changes relatively little from one image to the next. We get the "silky water effect" with a shutter speed of only a couple of seconds, and it doesn't become particularly more silky with a longer exposure.
What does change from one image to the next is the effect in the water below the fall. With shorter shutter speeds the lines are distinct, perhaps very discernible depicting individual splashes into the pool. With longer exposures these splashes "average out" and the lines become ever less distinct and more of an abstract shape.
Over an ever longer period of time the water becomes bands of colour, perhaps with a misty effect where the water meets the rocks (where the water renders at different levels as it moves up and down during the exposure). Neither of these effects is "correct", it's just a matter of your taste and vision. In general a shorter shutter speed gives an increased sense of power and movement. A longer shutter speed gives a more abstract feeling of serenity and mystery.
Looking at an Earlier Image Again
As I continued writing this article after posting the 105mm shot above, the page scrolled and the top of the image became clipped. I looked at it again with interest. Though an image that I had rejected as it didn't meet my vision and I felt it had flaws, cropping to my preferred 5x4 aspect ratio removed the bright, contrasty rocks at the top. This made a much stronger image and I quite liked the look of the water. I still prefer my final composition but perhaps in retrospect I should have tried working this particular composition a little more.


